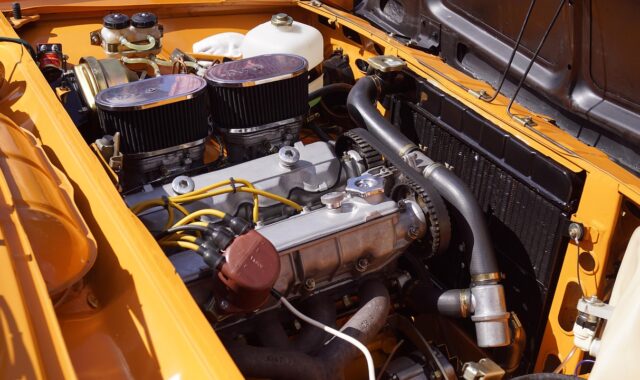
Automobile suspension system diagnostics for handling, noise, and tire wear problems
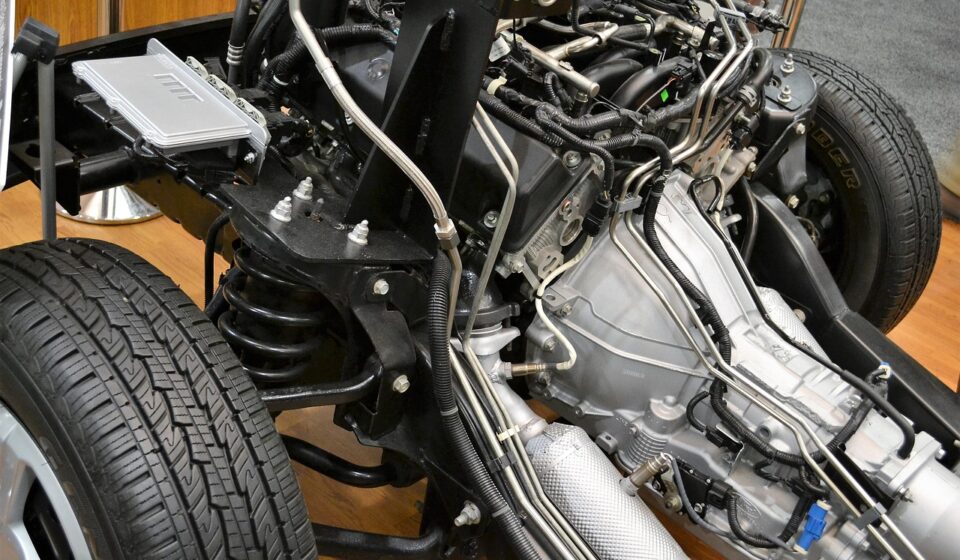
Why suspension diagnostics matter before parts replacement
An automobile suspension system does more than soften bumps. It keeps each tire working as a controlled contact patch, carries vehicle load, guides wheel movement, controls body motion, and gives steering, braking, tire wear, and electronic stability systems a predictable chassis baseline. In the workshop, a useful diagnosis starts with evidence: the customer complaint, tire condition, ride height, steering feel, road-test behavior, and alignment data. Replacing the loudest or most visible part first can miss the root cause, especially when a worn bushing, bent arm, weak damper, tire issue, and sensor calibration problem can produce similar symptoms.
Professional training frameworks recognize this overlap. ASE lists A4 as Suspension & Steering in its Automobile & Light Truck certification series, reflecting how suspension work sits beside steering diagnosis, wheel alignment, and tire evaluation in real service decisions. (ase.com) For broader diagnostic topics, see the workshop diagnostics section.

Safety is another reason not to rush straight to parts replacement. NHTSA TireWise reported 511 total motor vehicle traffic fatalities in 2024 in tire-related crashes. That figure does not show that suspension faults caused those crashes, but it does underline why tire evidence and chassis condition deserve careful attention during suspension diagnosis. (nhtsa.gov)
Main components and what each one tells the technician
A suspension fault rarely stays within one component group. The parts below should be read as a system, because one worn or incorrectly installed component can change the load path through several others. ASE Education Foundation task lists include operations such as inspecting strut assemblies, shock absorbers, mounts, bushings, ride height, pre-alignment condition, and four-wheel alignment. In practice, that means visual inspection, measurement, and final geometry all belong in the same diagnostic chain. (aseeducationfoundation.org)
| Area | What to inspect | What the evidence may suggest |
|---|---|---|
| Springs and ride height | Coil springs, leaf springs, torsion bars, air springs, ride-height points | Sagging, uneven vehicle stance, bottoming, altered alignment range, sensor angle changes |
| Dampers and struts | Shock absorbers, strut cartridges, mounts, dust boots, bump stops | Excessive body motion, cupped tire wear, nose dive, clunks over small impacts, oil leakage |
| Links and location parts | Control arms, trailing arms, lateral links, ball joints, bushings | Pulling, wandering, camber change, braking instability, uneven tire wear, impact damage |
| Stabilizer system | Sway bar, end links, frame bushings | Knocks on one-wheel bumps, increased body roll, broken or disconnected links |
| Wheel end | Wheel bearings, hubs, wheels, tires | Growling noise, vibration, runout, feathering, diagonal wear, pressure-related handling issues |
| Electronic controls | Height sensors, adaptive dampers, air suspension valves, ESC/ABS data, steering angle data | Warning lights, stored fault codes, incorrect ride height, calibration requirement after repair |
Symptom map for common suspension complaints
Symptoms point to test areas; they do not name the failed part by themselves. A clunk can come from a stabilizer link, strut mount, ball joint, loose fastener, worn bushing, brake hardware, or even an exhaust contact point. A pull can come from alignment, tire conicity, brake drag, ride height variation, collision damage, or steering sensor issues. The value of a symptom map is that it keeps the inspection from narrowing too early.
| Customer complaint | Likely first checks | Do not overlook |
|---|---|---|
| Clunk over bumps | Stabilizer links, strut mounts, control arm bushings, ball joints | Loose subframe hardware, brake caliper hardware, damaged bump stops |
| Vehicle pulls to one side | Tire pressure, tire swap test, ride height, caster/camber/toe, brake drag | Shifted cradle, bent strut, steering angle sensor after alignment |
| Steering wheel off center | Toe setting, rear thrust angle, steering linkage, prior repairs | Rear suspension misalignment, collision repair history |
| Uneven tire wear | Pressure, toe, camber, worn dampers, loose bushings | Wheel runout, tire rotation history, overloaded use |
| Excessive bounce or float | Dampers, struts, springs, mounts | Incorrect tire pressure, overloaded vehicle, weak rear suspension |
| Warning light after suspension work | ABS/ESC scan, height sensor links, steering angle data, ADAS calibration information | Disconnected sensor, wrong ride height, incomplete relearn or calibration |
A practical workshop diagnostic workflow
A repeatable workflow helps the technician avoid chasing noise, replacing good parts, or aligning a vehicle that cannot hold alignment. The steps below are written for general workshop use; always follow the vehicle maker’s repair information, lifting procedure, torque sequence, and calibration requirements for the specific model.
- Interview and record the complaint. Ask when the symptom happens: cold, hot, loaded, braking, accelerating, turning, on rough roads, at highway speed, or after a collision or tire change. Record any recent work, tire replacement, curb impact, wheel upgrade, or ride-height modification.
- Perform a basic safety inspection before the road test. Check tire condition, wheel fasteners, visible suspension damage, fluid leaks, and obviously loose components. Do not road test a vehicle that has a separated joint, broken spring, severely damaged tire, or unsecured steering part.
- Road test to reproduce the symptom. Use a controlled route with smooth pavement, rough pavement, low-speed turns, moderate braking, and steady highway speed when appropriate. Separate body-motion symptoms from wheel-speed vibration and steering pull.
- Start with tires and wheels. Confirm tire size, load rating suitability, inflation pressure, tread depth, tread pattern, rotation position, and wheel damage. NHTSA’s tire-pressure rulemaking analysis explains that under-inflation changes the tire footprint and can affect braking force transmission, handling in curves and lane changes, and hydroplaning risk. (nhtsa.gov)
- Measure ride height before alignment. A sagging spring, incorrectly installed strut, damaged air spring, or overloaded vehicle can place control arms outside their intended operating range. If ride height is wrong, alignment numbers may be misleading.
- Inspect with the suspension loaded and unloaded. Some ball joints and bushings show play only in a loaded position; others require unloading according to the manufacturer’s method. Use pry bars and dial indicators only where appropriate, and avoid damaging rubber or sealed joints.
- Use alignment readings as diagnostic data. Do not treat alignment as the first cure. A camber or caster value outside adjustment range may indicate bent structure, shifted subframe, worn bushings, incorrect ride height, or a damaged strut rather than a simple toe adjustment.
- Scan electronic systems when warning lights, adaptive suspension, air suspension, ESC, ABS, or ADAS are involved. Check diagnostic trouble codes, live data, steering angle, height sensor values, and calibration status before and after mechanical repair.
- Confirm the repair. After replacement, torque fasteners at the specified ride position where required, perform alignment or calibration if specified, clear codes only after recording them, and road test again to confirm that the original complaint is resolved.
How tires, alignment, and suspension faults interact
Tire wear is one of the most useful evidence trails in suspension diagnostics, but it is easy to overinterpret. Inside-shoulder wear may suggest excessive negative camber or toe-out, but it can also follow worn bushings, sagging ride height, collision damage, or aggressive driving. Feathered tread often points toward toe error, while cupping or scalloping can be associated with damper control issues, imbalance, or wheel-end looseness. Because tire pressure also changes the contact patch, pressure must be verified before drawing conclusions from wear patterns. NHTSA notes that traction grades relate to wet stopping ability and that tire design can influence handling, ride comfort, rolling resistance, and other performance factors. (nhtsa.gov)
The strongest diagnostic approach is comparison. Compare left-to-right ride height, left-to-right tire wear, front-to-rear wear, current alignment readings, and the vehicle’s repair history. If the vehicle has one heavily worn tire on the right front, a centered steering wheel, and a recent curb strike, the inspection path is different from a vehicle with four evenly cupped tires and no impact history.
Wear patterns to document before repair
- Shoulder wear: Note whether the inside, outside, or both shoulders are worn and compare the pattern with camber and toe readings.
- Feathering: Run a hand lightly across the tread to feel for sharp and smooth edges that may suggest toe-related scrub.
- Cupping or scalloping: Look for repeated high-low patches that may involve damping, balance, wheel runout, or looseness.
- One-wheel wear: Prioritize localized impact damage, dragging brake, bent wheel, hub issue, or corner-specific suspension wear.
- Diagonal or irregular wear: Check inflation, rotation history, wheel balance, worn dampers, and rear alignment where applicable.
Modern electronics change the diagnostic order
Electronic stability control can help manage loss of control, but it is not a substitute for a mechanically sound chassis. NHTSA’s ESC rulemaking materials discuss vehicle yaw stability, oversteer intervention, understeer considerations, and lateral responsiveness testing. For suspension diagnostics, that is a useful reminder that electronic control depends on predictable vehicle dynamics. (nhtsa.gov) If a vehicle has worn bushings, mismatched tires, incorrect ride height, or a steering angle value that does not match straight-ahead travel, the electronic system may receive inputs that do not reflect the driver’s expectation.
Adaptive dampers, air suspension, self-leveling systems, and ADAS features add another layer. Height sensors may be linked to control arms. Air suspension may require a service mode before lifting. Some ADAS calibrations require a level surface, controlled ride height, correct tire size, correct vehicle loading, or an alignment-related procedure. I-CAR’s repair resources emphasize checking OEM procedures because calibration requirements vary by make, model, and system. (rts.i-car.com) See also: braking and chassis.
Electronic checks that belong in the suspension bay
- Run a pre-scan when warning lights, collision history, ride-height faults, or ADAS complaints are present.
- Inspect height sensor links and wiring before condemning electronic dampers or air springs.
- Check whether the steering angle sensor reads near zero with the steering wheel centered and the vehicle pointed straight.
- Confirm whether an alignment, suspension repair, wheel change, or ride-height change triggers calibration in the OEM procedure.
- Perform post-repair scans and document codes, calibration steps, alignment results, and road-test findings.
Repair priorities and customer communication
Good suspension diagnostics should end with a clear repair priority, not just a list of worn parts. Safety-critical looseness, separated joints, cracked springs, unstable wheel bearings, and damaged tires should be explained first. Items that affect tire life or alignment retention should be separated from comfort-related issues such as minor damper seepage or early bushing cracking, unless the manufacturer defines the condition as a failure.
- Do not align over worn parts. If a joint or bushing cannot hold position, the alignment printout may look correct only until the vehicle is driven.
- Explain cause and effect. A customer is more likely to approve the right repair when they understand that a torn bushing caused toe change, which caused tire wear.
- Separate required from recommended. A broken spring and a lightly worn stabilizer bushing are not equal priorities.
- Document measurements. Ride height, tread depth, tire pressure, alignment readings, and scan results reduce disputes and support future service decisions.
- Verify after repair. A final road test is not optional when the original complaint involved noise, pull, vibration, or electronic warnings.
Frequently asked questions
What is included in an automobile suspension system?
It commonly includes springs, shock absorbers or struts, control arms, bushings, ball joints, stabilizer bars, links, mounts, and related wheel-end components. On many modern vehicles it may also include height sensors, adaptive dampers, air springs, control modules, and links to ABS, ESC, or ADAS systems.
Is wheel alignment part of suspension diagnostics?
Yes. Alignment is both a service operation and a diagnostic measurement. However, it should normally follow inspection of ride height, tires, steering parts, suspension joints, bushings, and possible impact damage. If the vehicle has worn or bent parts, alignment alone may not solve the complaint.
Can a bad suspension affect braking?
It can. Suspension condition influences how weight transfers, how firmly tires stay in contact with the road, and how stable the vehicle feels under braking. Tires and brakes remain central to stopping performance, but weak dampers, loose joints, incorrect ride height, and poor alignment can make braking feel unstable.
Do electronic suspension faults always turn on a warning light?
No. Some faults set obvious warning lights, while others appear only as stored codes, abnormal live data, failed calibration, uneven ride height, or poor road behavior. Mechanical faults such as worn bushings or weak dampers may not trigger a dashboard light at all.
Should shocks or struts be replaced before alignment?
If shocks, struts, springs, control arms, ball joints, or bushings are worn or being replaced, complete that repair before final alignment. Changing these parts can alter ride height, camber, caster, toe, or steering center, so the final alignment should reflect the repaired condition.